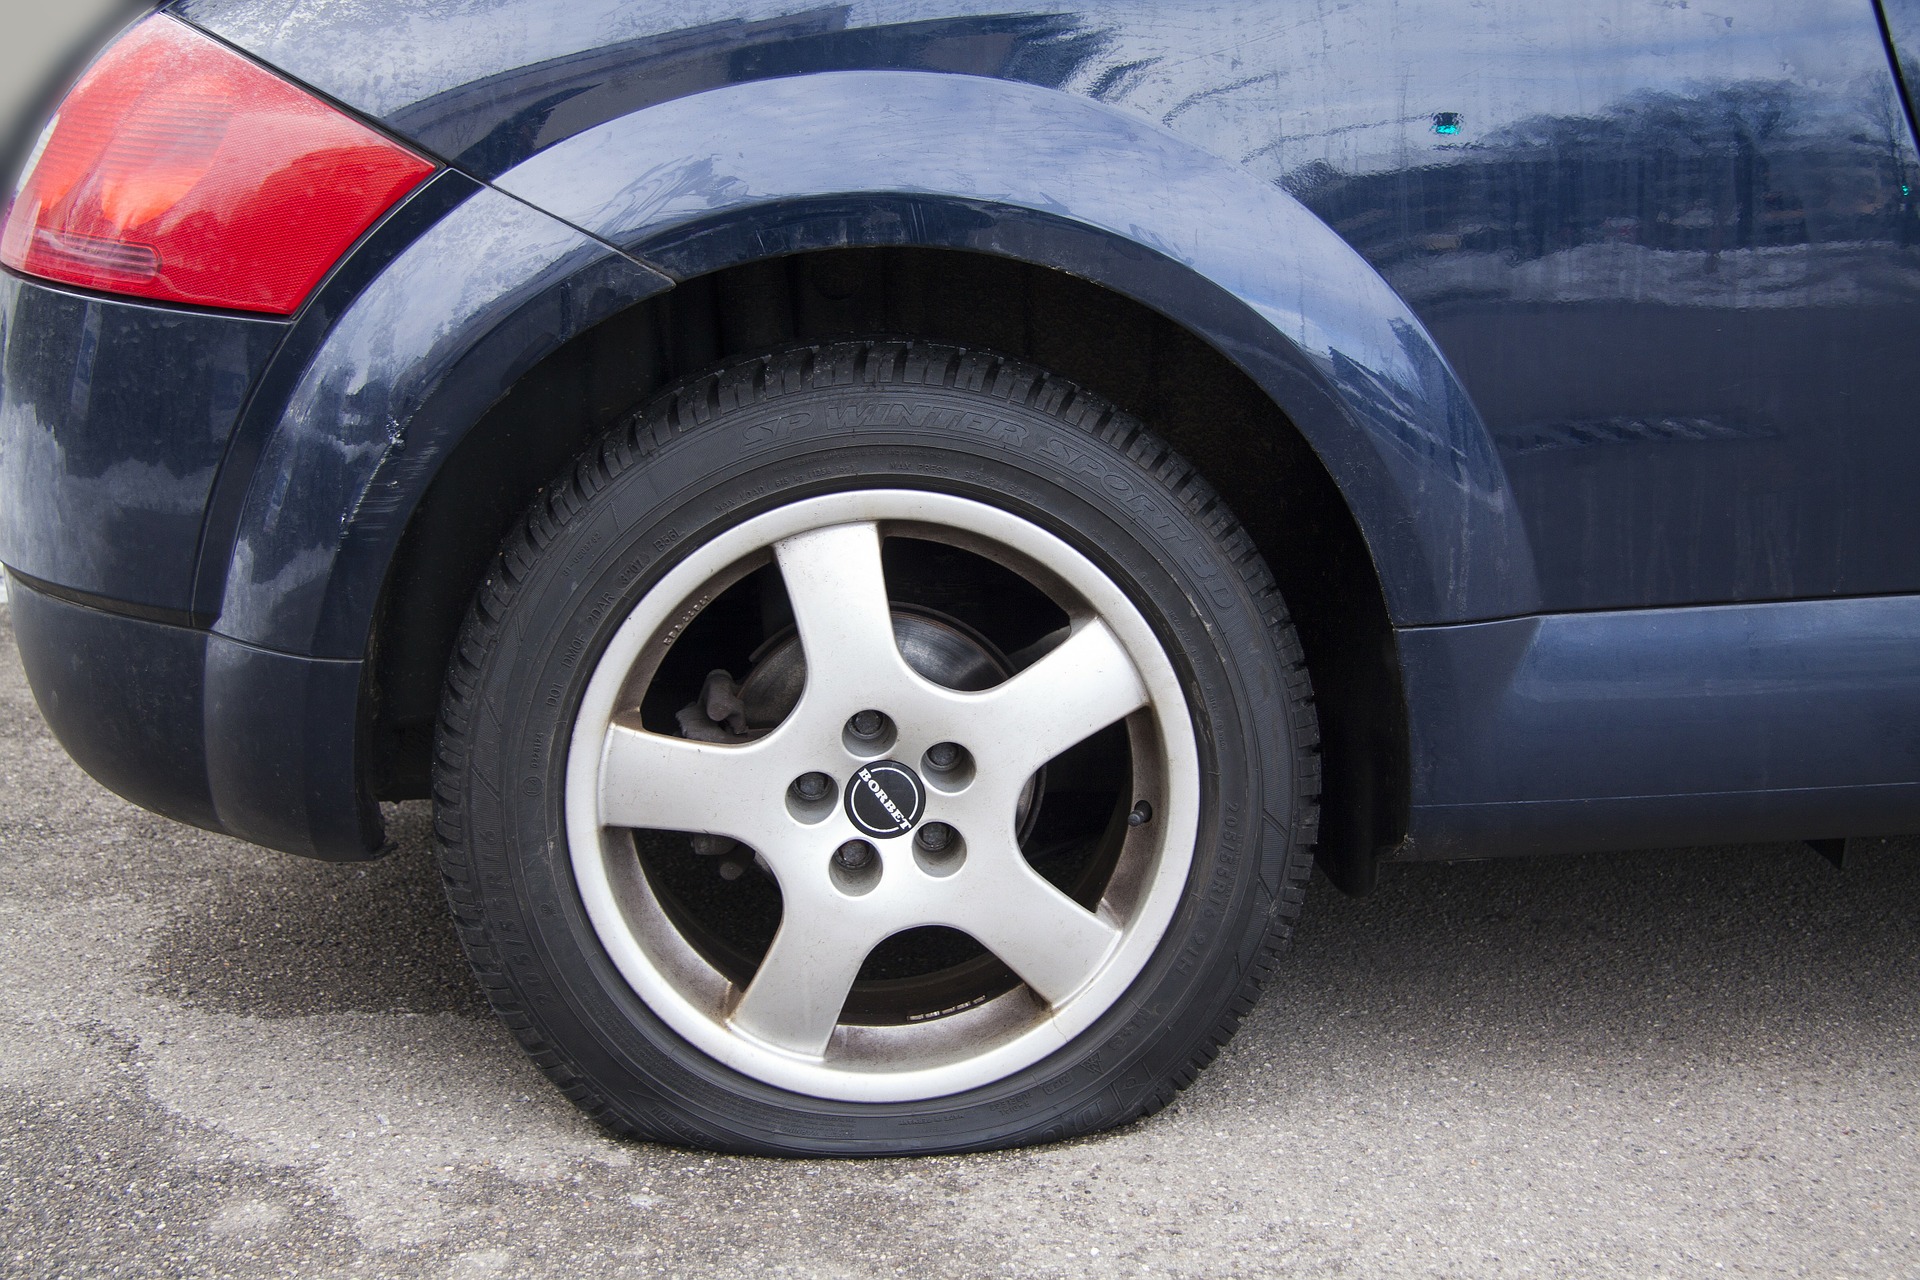
A flat tire is not something that anyone wants to deal with, but chances are you’ll encounter one at some point in your driving career. Flat tires seem to strike at the worst times – like when you’re on the way to an important business meeting or in the middle of moving across the country. If you are unsure of how to change a flat tire, then having one might seem like a big issue. Fortunately, it doesn’t have to be. Here we lay out five easy steps you can take to get your flat tire changed so you can hit the road again. Before beginning these steps, make sure your vehicle is safely off to the side of the road. Try to pull into a parking lot if possible.
Step 1 – Locate the Necessary Tools
To change your tire you will need to locate the spare tire, a tire iron, and a diamond jack. These items should always be stored somewhere in the trunk of your car along with other essential equipment.
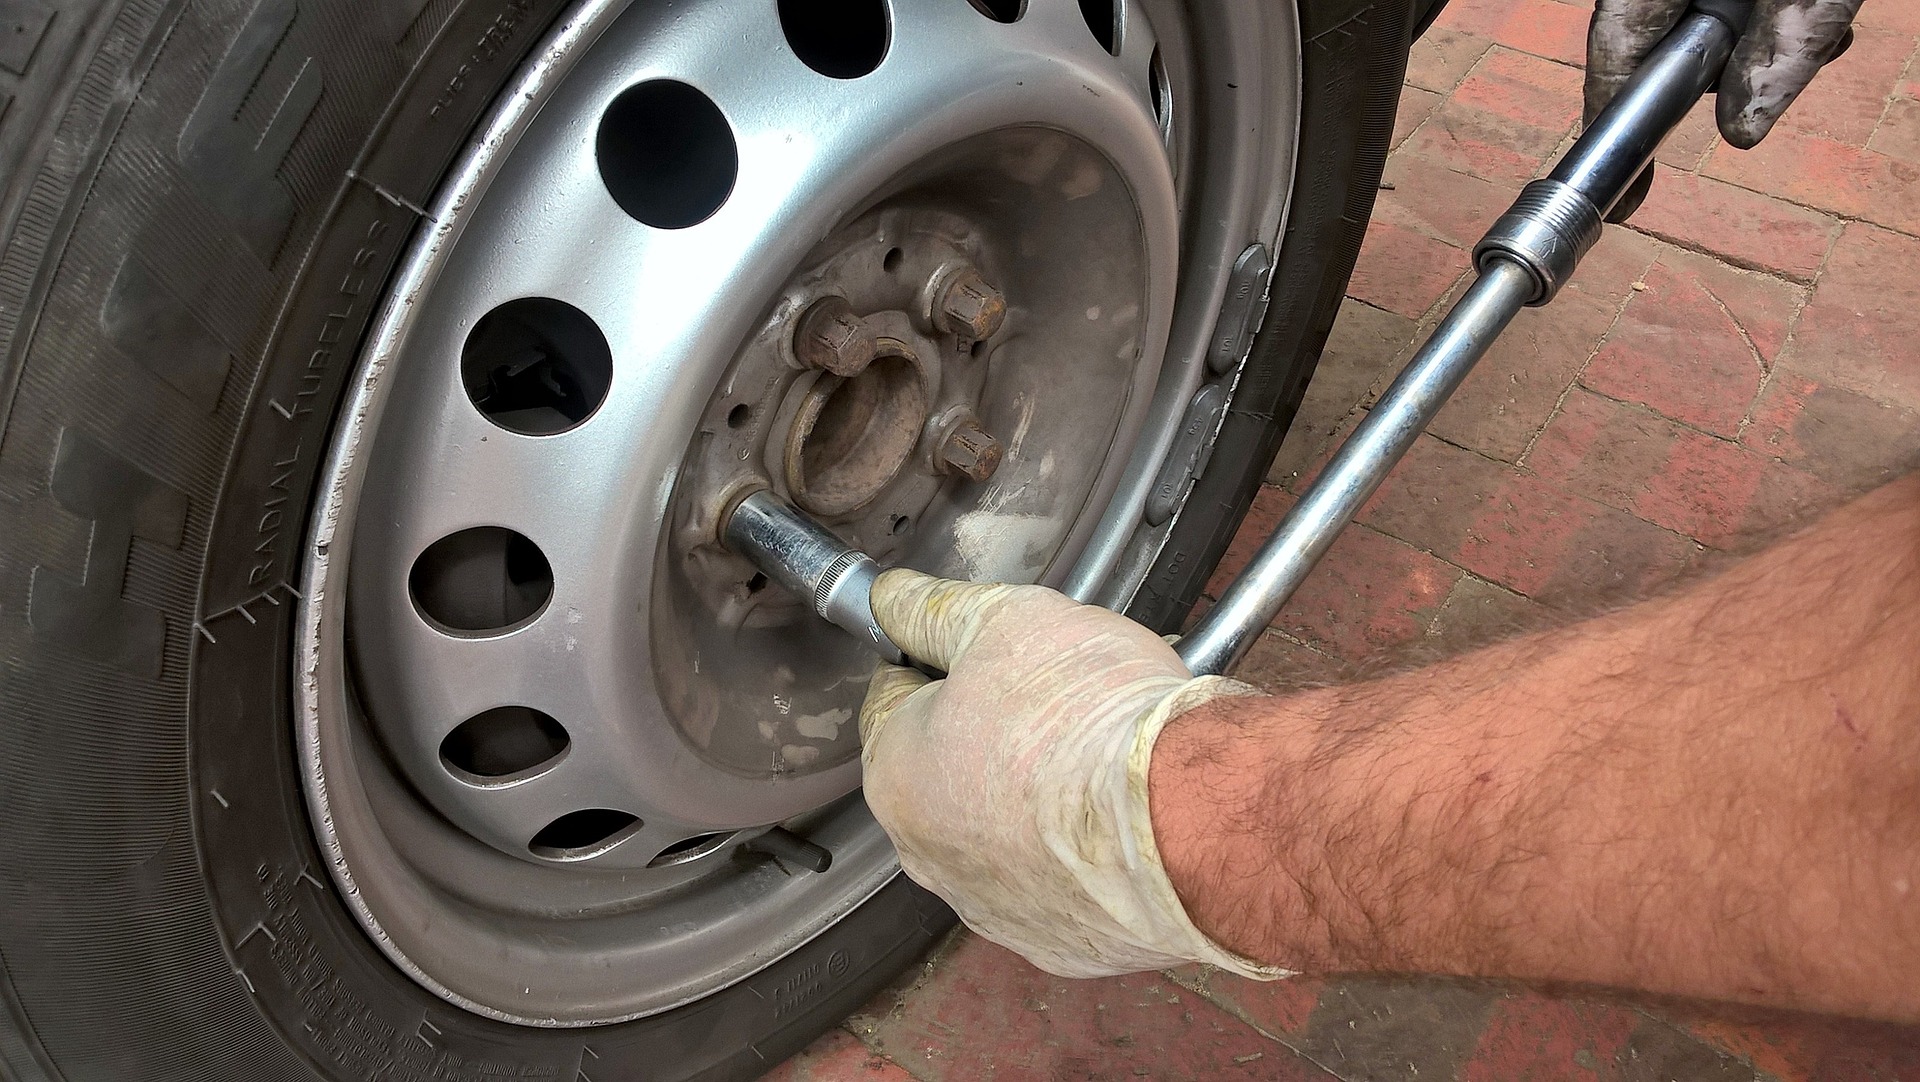
Step 2 – Loosen the Lug Nuts on the Tire
Before you can remove the tire, the lug nuts will need to be removed. In this step, just loosen the lug nuts. If you raise the car and then try to loosen the lug nuts, the wheel will just spin. It is easiest to loosen the lug nuts while the weight of the car is on the tire keeping the tire from moving. Place the lug wrench or tire iron around the lug nut and turn counter-clockwise.
Step 3 – Jack up the Car
Take the diamond jack and place it under the frame of the car. The jack will begin to raise or lower depending on whether you turn it to the left or right. You need to ensure that it is under the frame so it will lift the car properly. Many cars will have a notch in the frame near each one of the wheels. Find this notch by the wheel you are working on and place the jack under it. Check the owner’s manual for your vehicle to make sure you place the jack in the correct place so you don’t damage the frame.
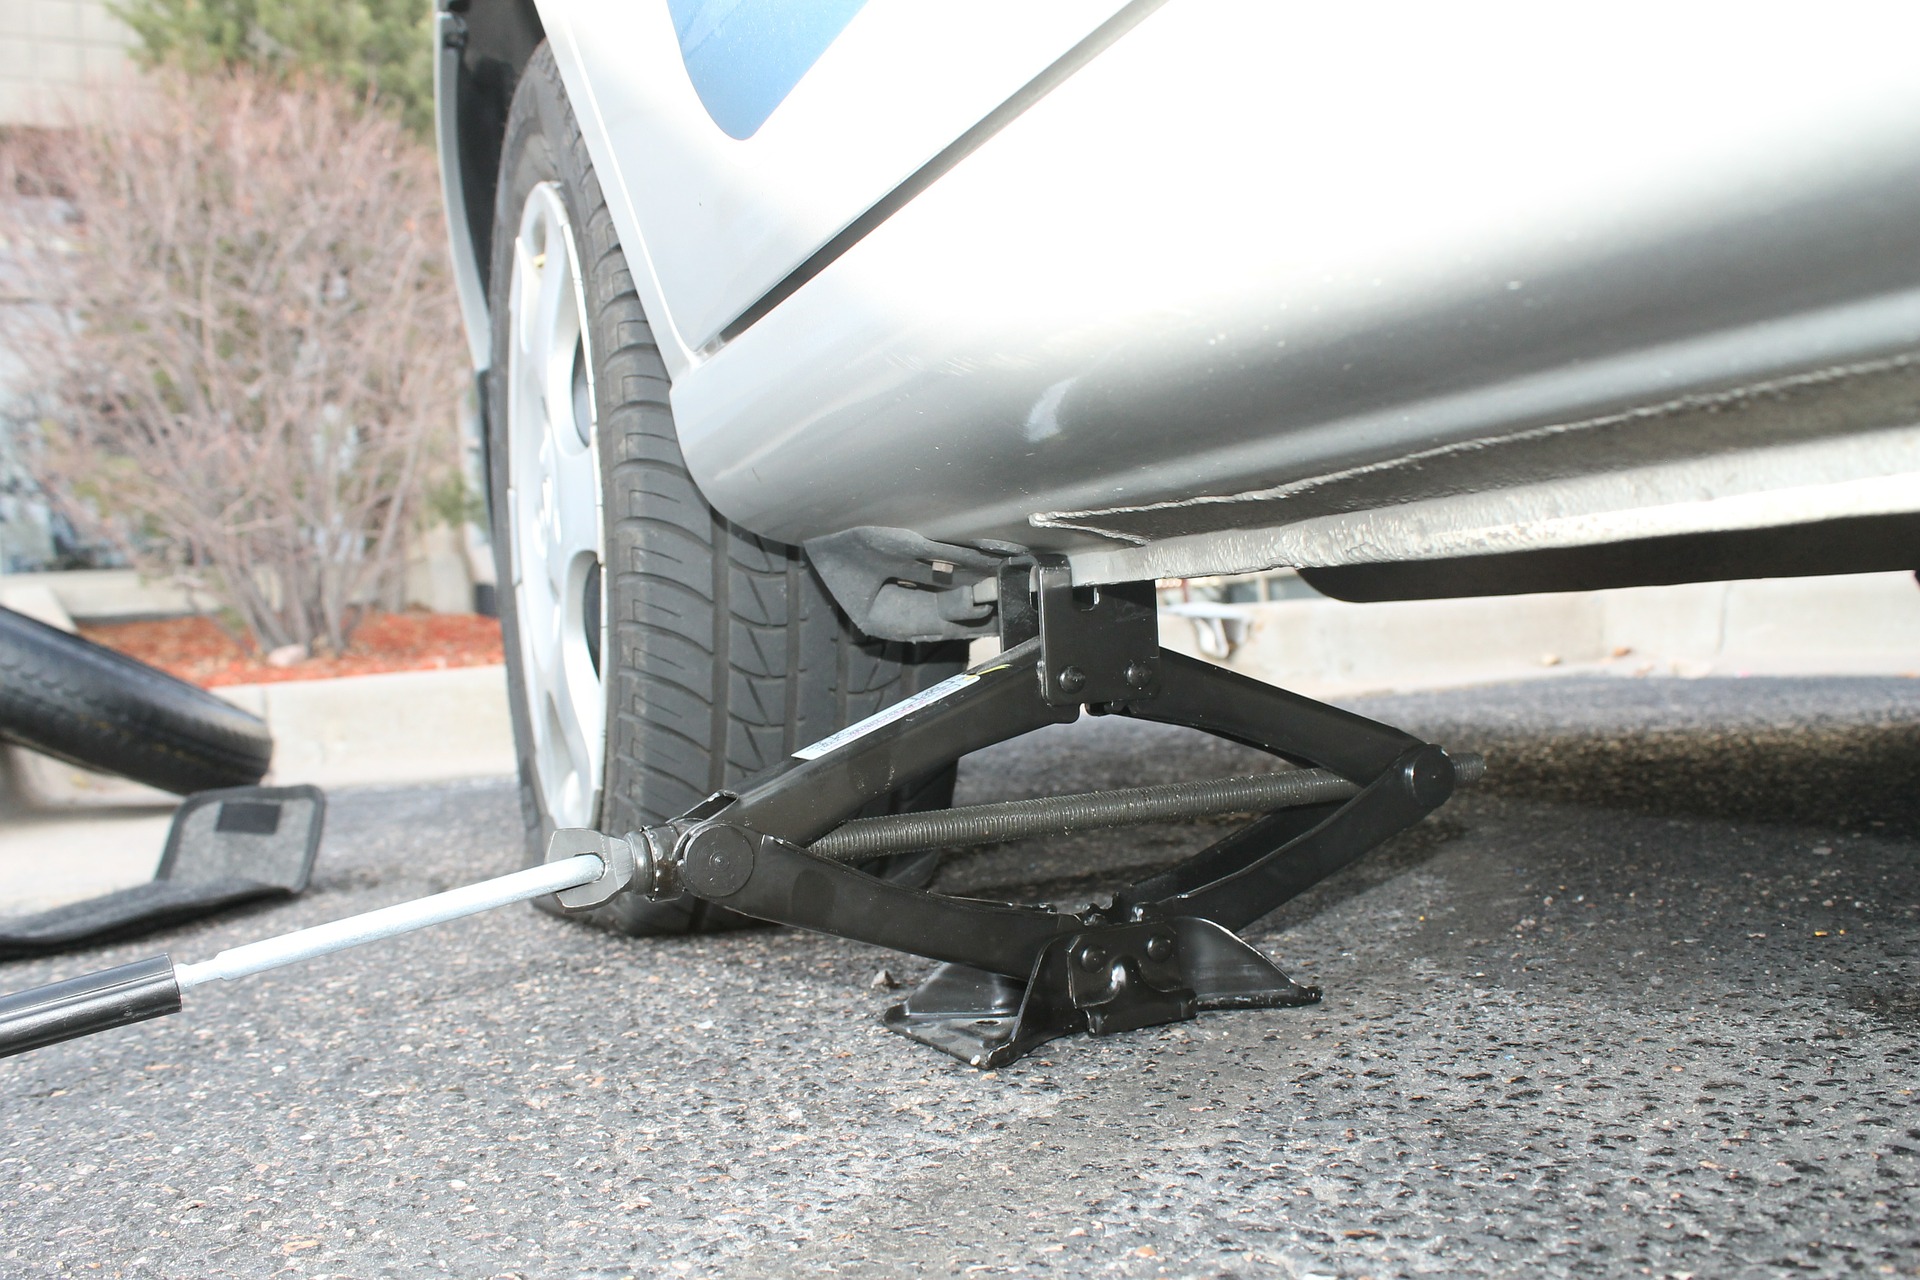
You will then lift the car by turning the lever of the jack. The car may make some noise while the it is being lifted; this is normal. You can stop raising the car when the tire is able to move freely without touching the ground.
Step 4 – Remove the Old Tire
Now, you will finish unscrewing and remove the lug nuts. Since they have already been loosened, you should be able to take them off by hand. Once the lug nuts are removed, pull the old tire off.
Step 5 – Secure the Spare Tire
Next, line up the new tire so the bolts go through the holes. Then hand-tighten the lug nuts. Avoid tightening the lug nuts with the tire iron, or the tire will just spin.

You should lower the jack by turning the lever on the diamond jack until the car is on the ground and the jack can be easily removed. Once the car is on the ground, you should use the tire iron to finish tightening the lug nuts. It is best to tighten the lug nuts diagonally. This means that you should tighten one lug nut and then tighten the one that is diagonal from the first. This helps to ensure that the tire is secure and will not wobble when you drive.
Unless your vehicle is equipped with a full-size spare, you’ll want to get your spare replaced with a new tire as soon as possible. Christian Brothers Automotive recommends driving no more than 70 miles on a spare “donut” tire. Make sure you hang on to the flat tire; a mechanic shop may be able to patch it so you don’t have to buy a new one.